Tuesday, July 3, 2012

birdie hangout


it's official, i've become a tad bird crazy {check out the obsession from my hummingbird and bird bath posts}. i got this idea from life on the balcony where they use lumber and washers and bolts and nails...which is a little too much work for me, especially when the boy is not home. instead i picked up a picture frame from the thrift store and the baby terra cotta pot from home depot. since i already had the hemp, bird seed and spray paint, this project cost me two dollars c:


here's how i did it: 
1. lightly spray painted the picture frame.
2. used a hot glue gun and attached hemp to either side of the frame. this allowed it hang and kept the front of the frame facing our kitchen window.
3. tied a little hemp around my terra cotta pot and hot glued the base of the pot to the picture frame.
4. then i hung it on a branch and filled it with bird seed.

i may have overfilled it...but i wanted the birds to know where the food was at c:
caught lynnee licking her lips...luckily the birdie hangout is out of her reach c:

Monday, July 2, 2012

herbs and birds

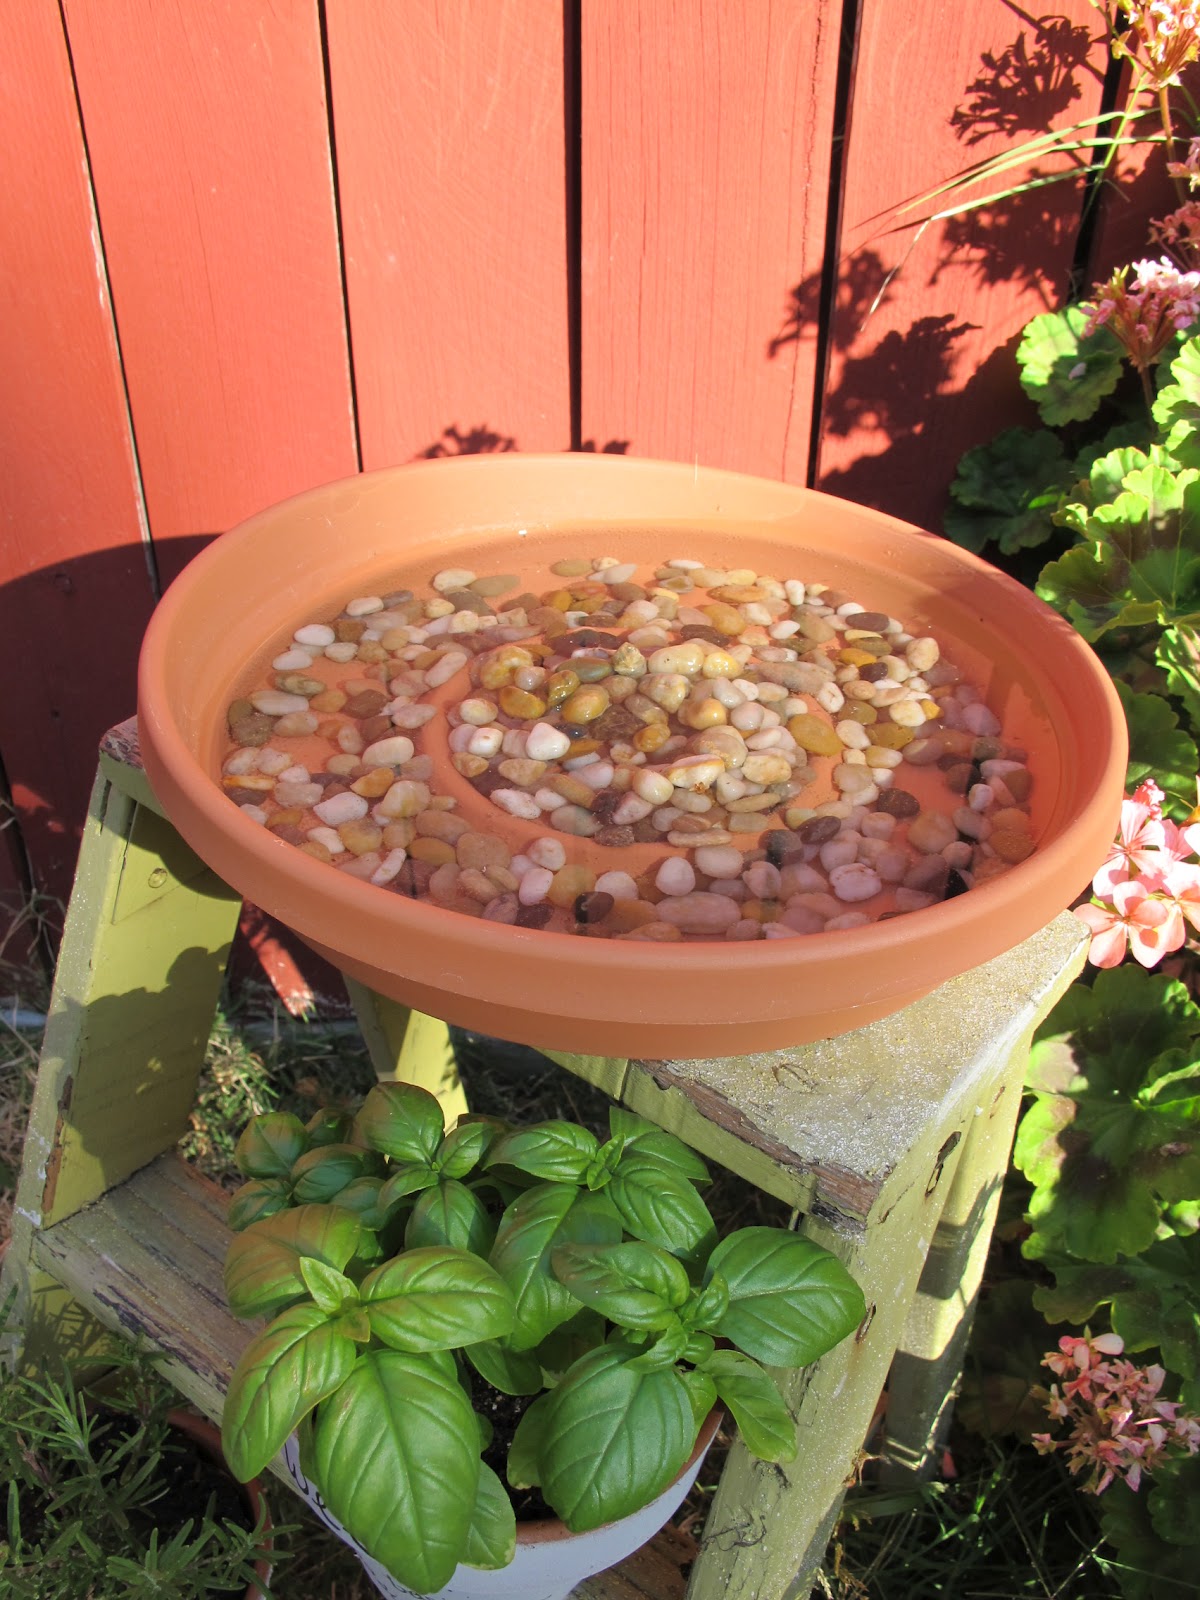
a birdie bath and some future eats, inspiration came from this incredible woman.
these are two of the three terra cotta pots i purchased on my thrift store score day, herbs {sweet basil and rosemary} from the home depot, also bought a saucer to hold the water and rocks, and our little step stool was free {and absolutely perfect in every way}.

for the flower pots:
i placed them upside down on a towel and spray painted white, i like that it left a little rim of terra cotta on top. after they were dry i simply took a sharpie and wrote on them, then transferred my herbs on over. i've watered them numerous times already and they've stayed perfectly intact c:

i've already caught a few birdies taking a bath. maybe, just MAYBE someday i could catch them with a camera in hand c:

Thursday, June 28, 2012

a place and a purpose

my thrifty treasures have found their homes.

thanks to that sweet boy of mine, the pitcher is holding flowers

the cd rack became our bill/important note holder
{hmmm...need to find a better name for that!}
{{i'll probably spray paint it later}}

glass bowl took on the responsibility of housing the q`tips in the guest bath

the other wire organizer in our fully organized linen closet
{originally the organizer was white, then i spray painted it yellow, but then i bought the turquoise and lime green baskets from the dollar tree....so my wire organizer may go back to being white, don't worry i'll keep you updated on this major decision}

and the woven basket now hosts our extra tp. 

i love that my finds have found a home c:

left to place and give a purpose are:
the books, terra cotta pots, picture frame and that dresser
...ohh, i am so excited about that dresser...


Wednesday, June 27, 2012

thrift store score

a dear beautiful friend introduced me to my new favorite thrift store
for seventeen dollars i got...
dresser needing a little tlc
wooden picture frame
book for husband's bday
two wire organizers
woven basket
yellow pitcher
glass bowl
three old books
three terra cotta pots

awww, i'm so happy and can't wait for the projects to begin.

Tuesday, June 26, 2012

a birthday

a birthday for the boy
there were balloons

yummy beer with the fam

two, yes two desserts

and of course there were presents...a very big one.

happy birthday love!

Friday, June 22, 2012

for the birdies

lately i've been all about the birds. we have big, beautiful windows in our kitchen that look onto a tree that's often the resting point for birdies. when i was younger, my parents always had bird feeders of all kinds around our property. now that i'm not apartment living, i can finally invite the birds over! but once i started looking to buy bird feeders, they seemed pretty expensive for how simple they were. i began searching the lovely site of pinterest, even giving the birds their own board , yes they're a tad spoiled c: my first bird project was for our hummingbirds. 

i LOVE browsing through pinterest to find inspiration and ideas for projects. however, most of the tutorials i find use materials that would require a little shopping, aka money spending. soooo, for this project i managed to switch up a few things with items i already had around the house. the only thing i had to buy was a feeder tube, this i did not have just hanging around the house c; i got my feeder tube from a local gardening and bird store sold to me for four dollars by a sweet lady who was a living dictionary for birds. 

{here's what i came up with}

you will need:
red plastic spoons
candle and lighter
bottle {plastic or glass}
twine, rope or a chain
feeder tube
glue gun
scissors

sorry i didn't capture every step with a picture...lucky the beautiful tutorial i based my project on took detailed pictures, find it here.

step 1. light that candle and enjoy the yumminess c: then get to work by gripping the spoon by the handle and holding the 'spoon part' about two inches over the flame. slowly rotate the spoon. it will begin to melt and warp. pull it away, wait a few seconds and CAREFULLY morph the spoon with your fingers. please be careful, it's pretty hot {go figure...it was just inches away from a flame}.
 this is what they look like after wards. each spoon will turn out a little different and random...just like flower petals.

step 2: use your scissors to snip off the handles of the spoons.

step 3: carefully hold the the tip of the spoon so that the edge you just cut is over the candle flame. this allows the rough edges to melt a little and be softened. immediately after i pulled the spoon from the flame i pushed it against the bottle {see below} so it gained a round shape and would be easier to glue on later. do this for all your spoons.

step 4: grab your hot glue gun and attach your petals one`by`one, by placing a dab of glue and pressing the end of your petal to the bottle for a couple seconds so it can secure the hold. i ended up having two layers on mine. 

step 5: hot glue twine to your bottle, or attach a chain. whichever you choose, make sure it can hang at a slant. 

step 6: save a little more money and make your own hummingbird food. easy and simple sugar water, 1 part sugar to 4 parts warm water. found this recipe here. once it cools a little, pour the sugar mix into the bottle.

step 7: plug in the feeder tube to close off the top and hang your hummingbird feeder. 


i'm so happy with how it turned out, especially with my only expense being the tube feeder. the feeder has only been up for a day or so, and i've been waiting patiently for my hummingbirds to come. which means making extra trips to the kitchen just to check in on them. 

Sunday, June 17, 2012

the boy is home

my boy is home...mustache and all. yup, apparently his whole unit decided to bring on the manly`ness during their few weeks of training. awww, but it's nice to have him home even if the mustache came with the package c; 
this weekend we have been giddy homeowners, the epitome of first time buyers. frequent trips to home depot, starting {key word} like eighteen projects only to move onto number nineteen and even mowing our poor DEAD lawn in 100 plus degree weather {he was pretty stoked about his new lawn mower}. my boy left just days after we officially moved into our home, so i've been doing all the unpacking by my lonesome. having him home just makes it feel so real...i love it. 

to do this week:
paint our mantle c: c:
unpack that last box i've been ignoring
organize the linen closet
make a bird feeder
finish the spare bedroom 
{in`laws are coming to town}

...and that's all i'm committing to for now.

happy sunday my friends!